Medical Mask Tutorial
Posted: Wed Nov 25, 2009 6:26 pm
Ok I apologize for the low quality of these and the fact that I'm using PAPER instead of material (like you should) but generally this will show you how to make a mask the way "I" do it.
(I'm in the middle of moving so all my materials and sewing supplies are packed up. when I finish moving I plan on redoing this tut. ok?) BTW I sew these to sell ^^; so sharing my secret is seeming kinda dumb but......
Materials you will need-
Fabric from which to make the mask.
Elastic to make the mask stay on.
Thread that matches the mask for which to sew.
(optional)Thread in opposing color for lining the edges so they do not fray.
Whatever decorations you desire.
(optional) White chalk to mark where to cut!
Step 1-
Fold your material in half! All you actually need in material is about regular printer sized anyhow.

Step 2-
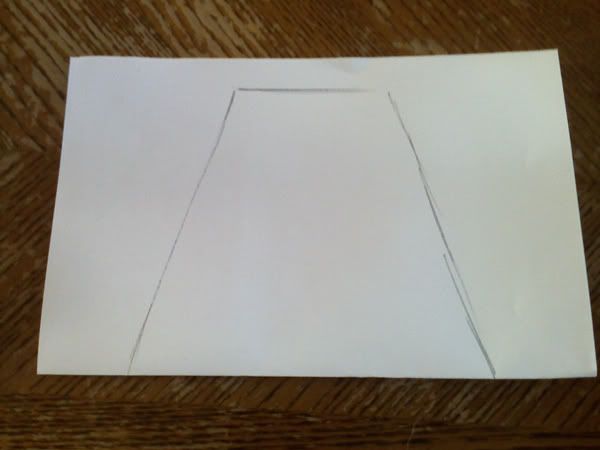
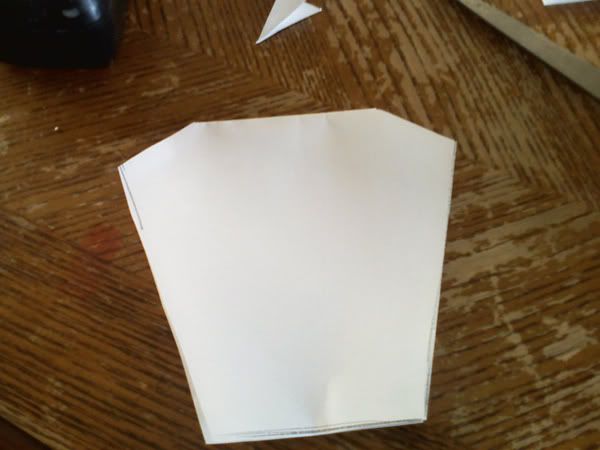
Now you get to use the chalk! Draw the pudding shape.......I know it's weird but I always think that when I do this. it reminds me of those flat topped little pyramid pudding things that my grandma always made. .....though those tasted terrible. Nonetheless that's what I call it so HAH. Anyhow If you don't feel ok with "free-handing" it then get out a ruler.
Step 3-
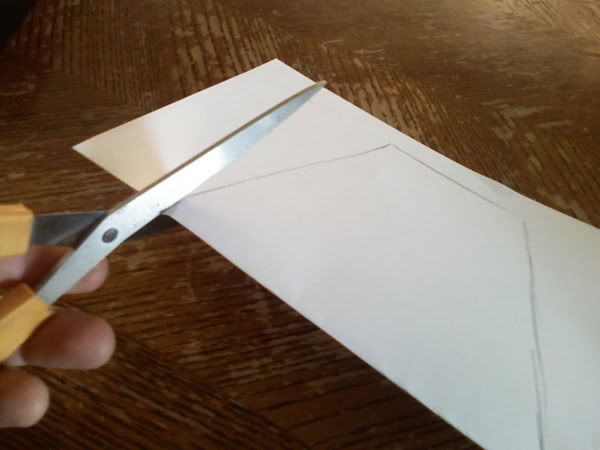
CUT! Normally when I'm working with fabric I will pin them together so they don't slip and leave me with uneven sides.
Step 4-
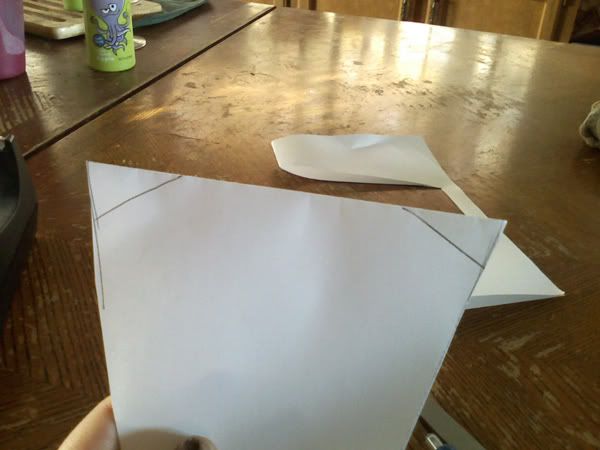
First mark along the edges. (with the chalk!)
Then sew them! (with the paper it was easier to staple and tape it afterwords but it's usually bet to sew and then cut -be careful not to cut the threads though!)
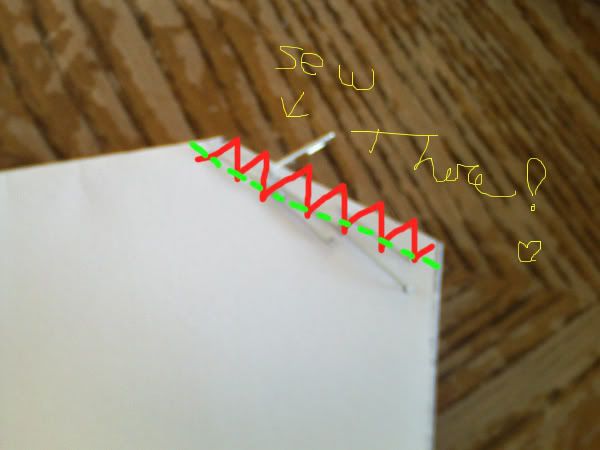
In this picture I made "threadlines" in photoshop to show you how to stitch this part.
IT"S IMPORTANT! These parts are under stress and usually need the extra hold.
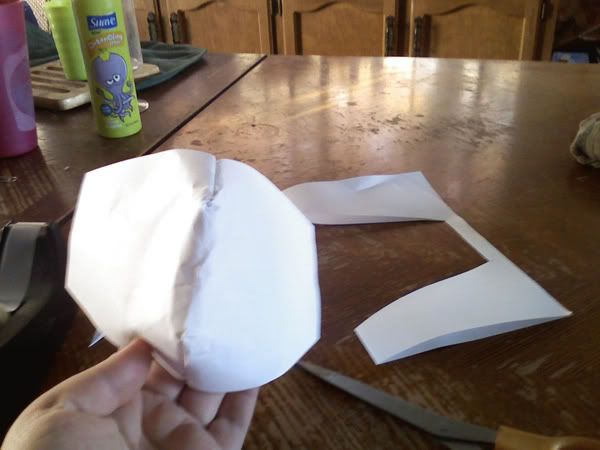
And then cut those edges off!
Step 6-
Turn it inside out making the seam go to the inside. (usually I have some excess material in there and I iron it to get it flat and it doesn't have a seam rubbing along my nose.)
and
TADA!
It should fit like this!
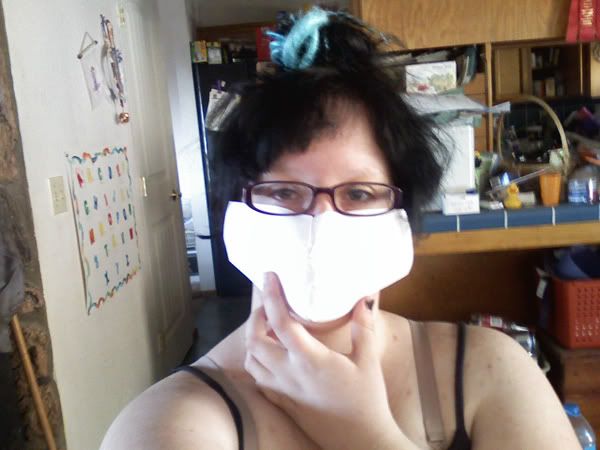
Sorry XP I know I look terrible. I spent the night holding a six year old who seems to have more nightmares than a horror movie. And my hair is still pinned up and only half done lol I got install happy and installed them as I made them. it's going to interesting as I think I'm running out of hair........ I really hope I can finish before then.....
You can sew on the elastic to the ends in a >---- sort of shape then tie it in the back (or make it to fit and simply stretch on and off. .....though I usually advise against this as - it is HELL to get it on and off when you have dreads or a wig. )
Once you do all that you can easily sew on decorations or paint them.
If you use Vinyl or leather Make SURE to make "breathing holes" or when you try to breath the mask will collapse in and you will have the same effect as putting a bag over your head! .......you do not want to do this. Passing out at a party is never as fun as it looks. lol
Good luck!
(I'm in the middle of moving so all my materials and sewing supplies are packed up. when I finish moving I plan on redoing this tut. ok?) BTW I sew these to sell ^^; so sharing my secret is seeming kinda dumb but......
Materials you will need-
Fabric from which to make the mask.
Elastic to make the mask stay on.
Thread that matches the mask for which to sew.
(optional)Thread in opposing color for lining the edges so they do not fray.
Whatever decorations you desire.
(optional) White chalk to mark where to cut!
Step 1-
Fold your material in half! All you actually need in material is about regular printer sized anyhow.
Step 2-
Now you get to use the chalk! Draw the pudding shape.......I know it's weird but I always think that when I do this. it reminds me of those flat topped little pyramid pudding things that my grandma always made. .....though those tasted terrible. Nonetheless that's what I call it so HAH. Anyhow If you don't feel ok with "free-handing" it then get out a ruler.
Step 3-
CUT! Normally when I'm working with fabric I will pin them together so they don't slip and leave me with uneven sides.
Step 4-
First mark along the edges. (with the chalk!)
Then sew them! (with the paper it was easier to staple and tape it afterwords but it's usually bet to sew and then cut -be careful not to cut the threads though!)
In this picture I made "threadlines" in photoshop to show you how to stitch this part.
IT"S IMPORTANT! These parts are under stress and usually need the extra hold.
And then cut those edges off!
Step 6-
Turn it inside out making the seam go to the inside. (usually I have some excess material in there and I iron it to get it flat and it doesn't have a seam rubbing along my nose.)
and
TADA!
It should fit like this!
Sorry XP I know I look terrible. I spent the night holding a six year old who seems to have more nightmares than a horror movie. And my hair is still pinned up and only half done lol I got install happy and installed them as I made them. it's going to interesting as I think I'm running out of hair........ I really hope I can finish before then.....
You can sew on the elastic to the ends in a >---- sort of shape then tie it in the back (or make it to fit and simply stretch on and off. .....though I usually advise against this as - it is HELL to get it on and off when you have dreads or a wig. )
Once you do all that you can easily sew on decorations or paint them.
If you use Vinyl or leather Make SURE to make "breathing holes" or when you try to breath the mask will collapse in and you will have the same effect as putting a bag over your head! .......you do not want to do this. Passing out at a party is never as fun as it looks. lol
Good luck!